DIY Ikea Hack Bookshelf Wall
This article may contain affiliate links on which I may earn a commission. As an Amazon Associate I earn from qualifying purchases.
Book lovers – this one is for you!
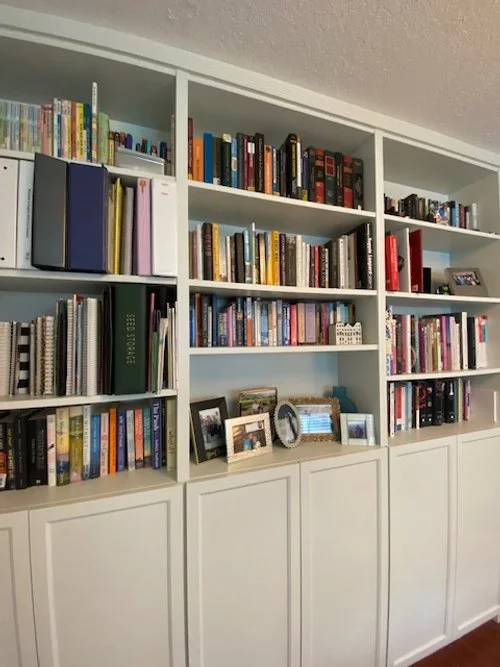
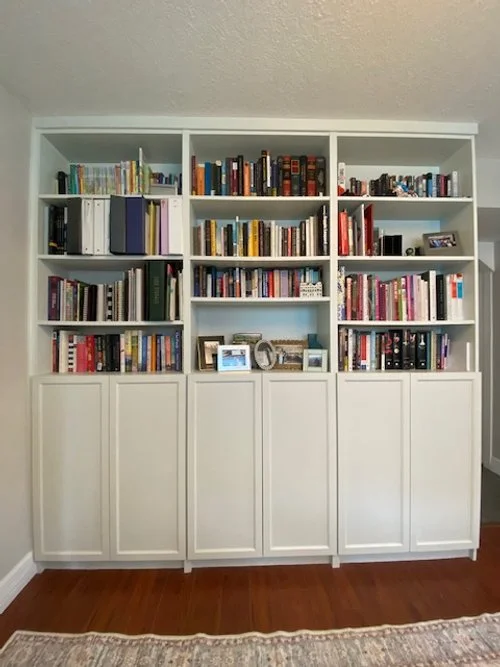
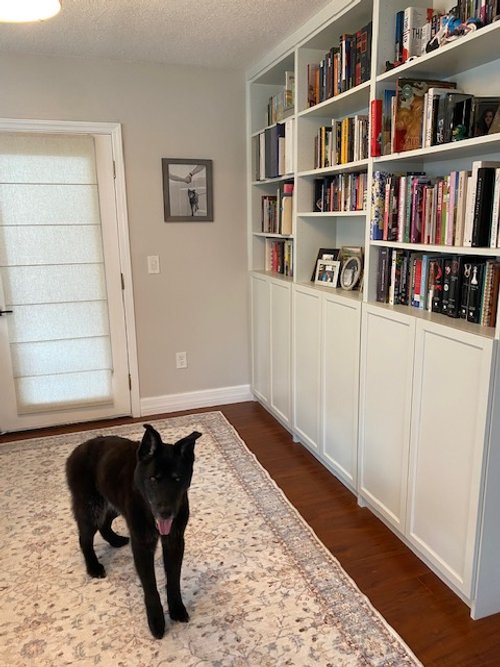
Bookshelf wall (color light mint) filled with books
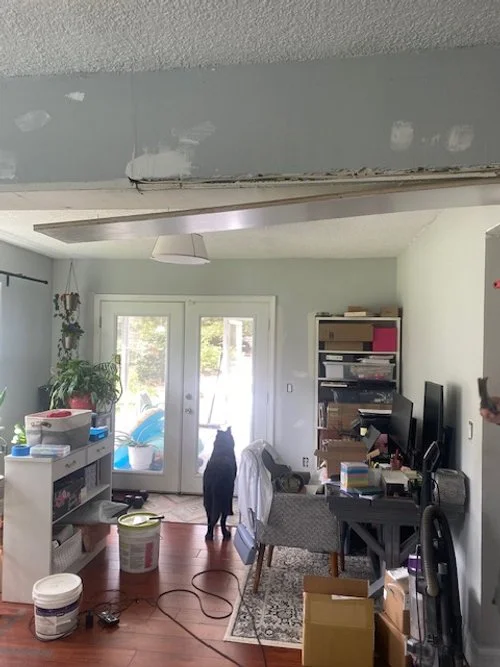
Some of the most impactful changes we’ve made to our new house have been adding storage- both functional and pretty! We love our tiny house, but the lack of storage has been a real problem. We decided to turn the area that was used as a dining room into my office (before pic is below).
Catfish Zillow Photo…taken before the prior owners moved in!
After We Moved In…and Realized the Place was Falling Apart
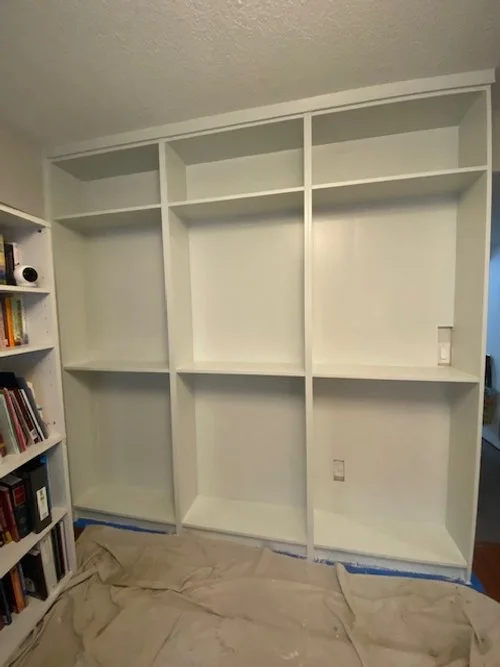
Instead of using two mismatched bookshelves that didn’t fit everything, I chose to create a bookshelf wall to fit all my books and office supplies and look good in the space. After pricing out the wood, materials, and all the extra tools I was told would be needed, I decided to try the Ikea hack to create our bookshelf wall.
In my head, I dreamt of homes and museums with giant libraries – you know, tall ceilings, an ornate wood library ladder, chic and sophisticated sconces, and endless books. In reality, we had just 1 wall to work with (approx. 8x9 ft.), and I had to let go of my dreams for the library ladder.
Using the measurements for our space, I went to the Ikea website to pick out the exact cabinets and configuration for what I wanted. I wanted open bookshelves on top and closed storage on the bottom. I originally thought I would use the Ikea PAX cabinets that are popular for similar projects. Due to the size of our space, the Billy was a better fit. We ended up using the Billy bookcases, Billy height extension units, and Oxberg doors to close the bottom half. A full list of our materials is below.
Full List of Materials:
3- Ikea Billy bookcases
3- Ikea Billy height extension units
6- Oxberg doors
Optional – door hardware
3” Decorative Trim for top of bookshelf
2- ¾-1” corner trim/molding for sides of bookshelf
18-Gauge Brad Nailer and Nails
Paint Primer
Paint (we used Behr Marquee - Glass Bead (570E-1) in Satin
Steps to DIY Bookshelf Wall:
#1 Clear the Space
We started with clearing the area of all existing furniture and rugs. Then we removed the baseboard so we could mount the bookshelves directly against the wall. Save the baseboard so you can re-use if needed. We ended up re-installing a 5” piece of this baseboard after installing the bookshelves.
#2 Assemble the Bookshelves
Following the Ikea instructions, we assembled the bookshelves one at a time.
#3 Mount Bookshelves on Wall
We started by mounting the first bookshelf in the left corner. We made sure this bookshelf was level, and then we worked from that bookshelf to mount the other two.
#4 Secure Bookshelves Together
We wanted to be extra sure these bookshelves are sturdy. To help secure and stabilize the bookshelves we screwed them together using 1” cabinet screws (in addition to Ikea hardware). To be extra secure, Alex recommends that you also glue the bookshelves together using a Locktite adhesive like this. You would add the adhesive on the side of the bookshelf before installing the second and third, before you screw them together.
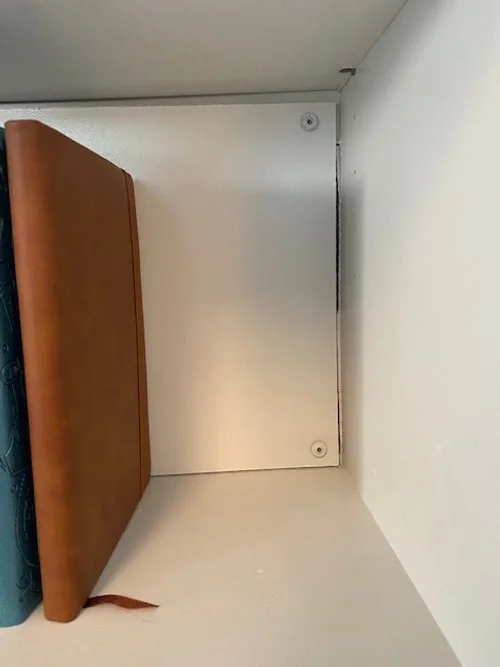
# 5 Optional: Light Switch Cover
Disclaimer- You should work with a licensed electrician to make sure any work with a light switch is done to code!
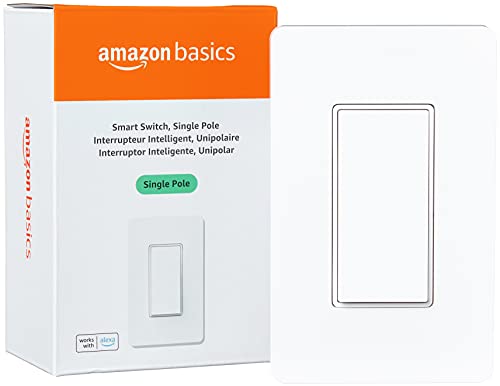
Instead of moving or losing our light switch, we loosely installed the backer board over our Amazon Alexa flip light switch. Alex expertly measured the location of the light switch and cut out that area from the back board of the bookshelf. Using small white cabinet screws, he then re-attached the cut piece of particle board over the light switch. This should loosely cover the light switch. Using the Alexa light, we don’t have to use the switch to turn the lights on or off. But if needed, you can still turn the light on or off by pushing the board.
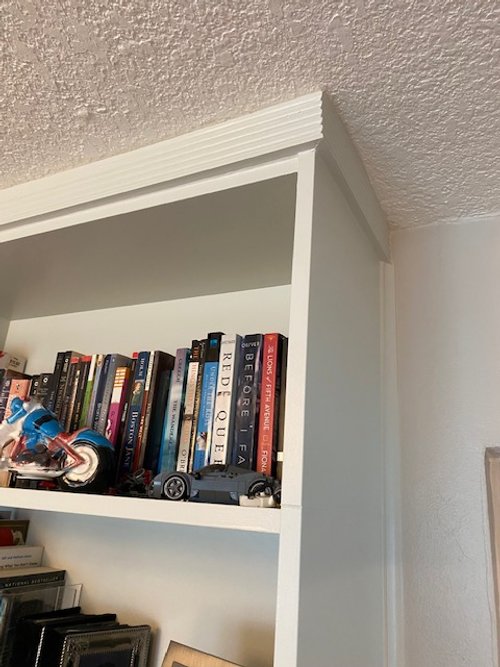
#6 Install Decorative Top Trim
We chose a 3” trim to perfectly cover the top of the bookshelf up to the ceiling. There are numerous options for decorative trim- choose one that fits your style and space. We installed the trim using an 18-gauge Brad Nailer (like this one)- as the name suggests, this uses 18-guage nails.
#7 Install Corner Trim
Next, we installed ¾” inch corner trim primed molding. These were also installed using the 18-gauge brad Nailer.
#8 Caulk Edges
Caulk all the edges and seams from the wall, ceiling, trim and bookshelf. This ensures there are no gaps or seams giving it a clean, built-in look.
#9 Prime & Paint
Once your caulk has dried, you are ready to prime and paint. First, gently sand the surface of the bookshelves and cabinet doors (everywhere you will paint) to help the paint adhere. Use a microfiber cloth to wipe away any dust or debris.
Next, prime the bookshelves and cabinet doors. We left the cabinet doors off for painting and installed them once the paint was dry.
We skipped the priming step thinking we could get away with using the Behr Marquee Paint and Primer in one. Don’t be like us! The Ikea particle board is difficult to paint- the paint just peels right off. To help prevent peeling and keep your paint chip-free long-term, prime the bookshelves and let it thoroughly dry before painting with your color of choice.
Picking the right paint color is always a hard decision for me! I use the “visualize this color” feature on the Behr website to try to see how different colors look in different virtual rooms. Once I pick a few, then I go to the store to get small paint samples to try the color.
Our house is quite small, and the first floor is really a small, relatively open square. The office with the bookshelf shares half of the first-floor space with our living room. Generally, I wanted a paint color that would blend with the rest of the room. I love a dark, moody bookshelf wall, but wanted to keep the space light and airy for coastal chic vibes. We settled on Behr Glass Bead which I would describe as the faintest mint color ever. It blends so well with our wall color- Behr Dove- and almost a year later, I am still so happy with our pick!
#10 Install Cabinet Doors & Hardware
Once the paint has thoroughly dried- give it at least 48 hours- you can install the cabinet doors. Use the Ikea hardware and follow the Ikea instructions to hang the Oxberg cabinet doors. Next, add door hardware if desired. We – still – have not agreed on adding the door hardware. I purchased the first doorknobs pictured below from Hooks and Knobs. They are beautiful, but they were way too big for these doors, so I repurposed them for another project. The second doorknobs (gold) are the perfect size, but Alex and I are still debating on whether we should add them. We both like the clean look without the doorknobs, but I also think they would be a great addition. Let me know if you are team doorknob or not!!
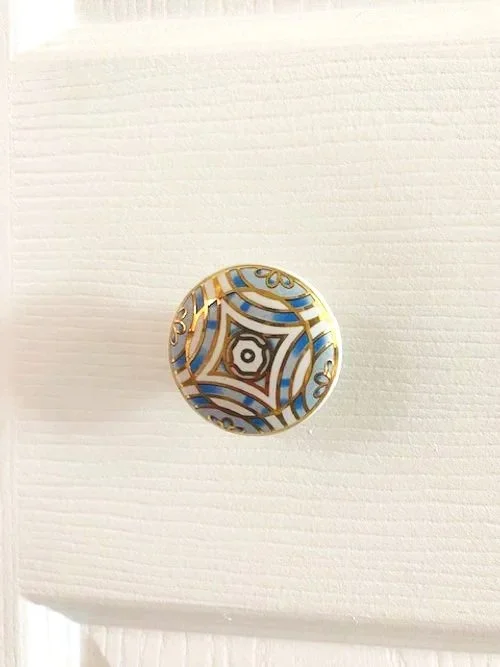
Doorknob - blue, white and gold ceramic art deco style
Similar doorknobs from Amazon-


#11 Fill with All the Books
Now that your paint is dry and doors are up, you can get to unpacking your books. This is the absolute best part- getting all your books on the shelves and seeing your hard work for the bookshelf wall pay off.
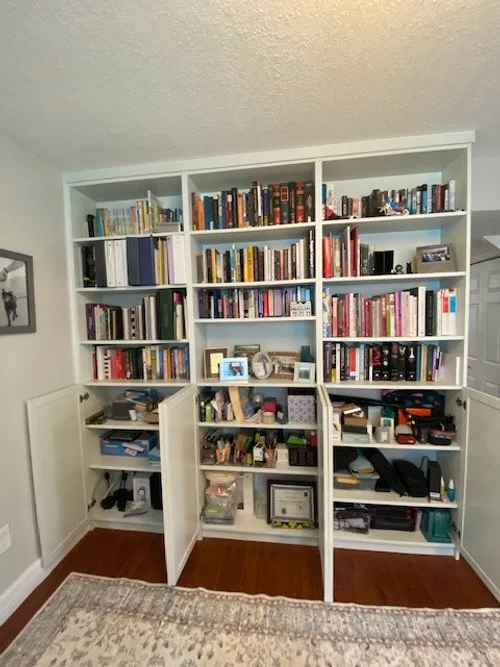
For the bottom shelves I used storage containers like the ones linked below to keep all my office supplies organized. I have a ton hidden in these bottom shelves- printer paper, paint, pens, markers, etc., assortment of greeting cards, and all of our tech items- speakers, chargers, headphones, old phones, CDs (yes, we still have them 😊), and even a few outdoor entertaining items that didn’t have a home (keep scrolling for pics below!).

I absolutely love the way this bookshelf wall turned out! Let me know if you build your own!